¶ Upload and Sign Documents
To sign one or multiple documents, the user can select which documents to sign through DS Sign&Go.
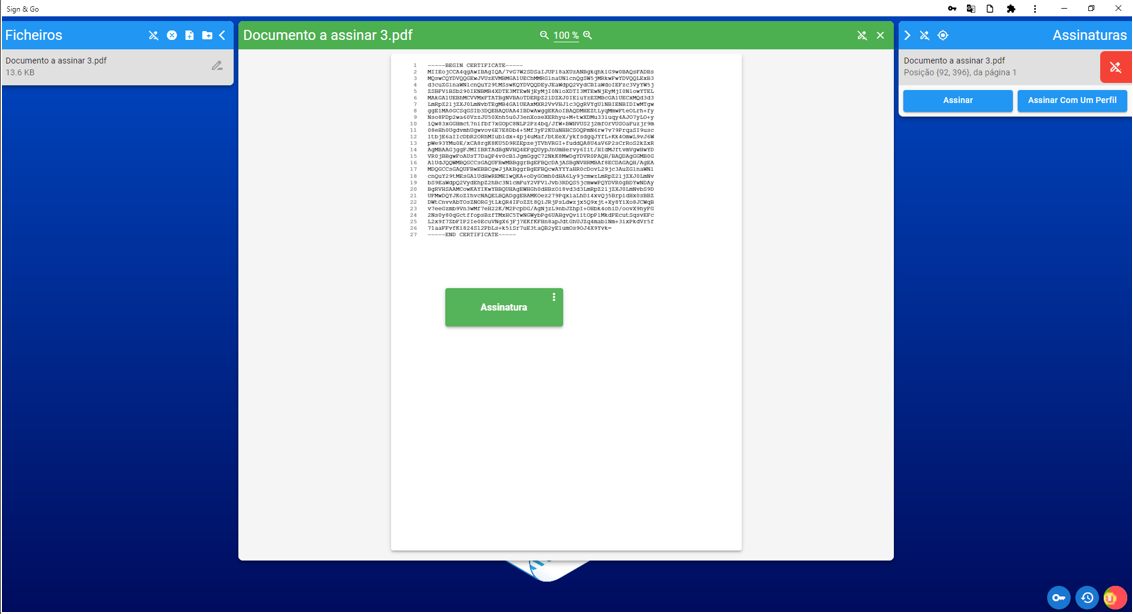
To do this, in the top-right corner, you will find a tab named "Files" (see image below), where you can upload documents or a folder containing multiple documents.

Alternatively, the user can drag files directly into DS Sign&Go and proceed to sign them.
¶ Select Signature Profile
If you haven't created a signature profile yet, you can see how to create one here.
When uploading a document for signing, a tab named "Signatures" will appear in the top-left corner. In this tab, besides showing the documents uploaded to the platform, you can also choose the option Sign with a Profile.
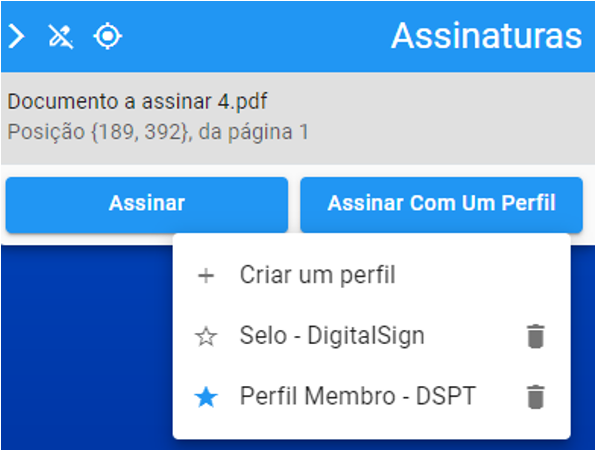
Here, the profiles created by the user will be displayed, along with the favorite profile:
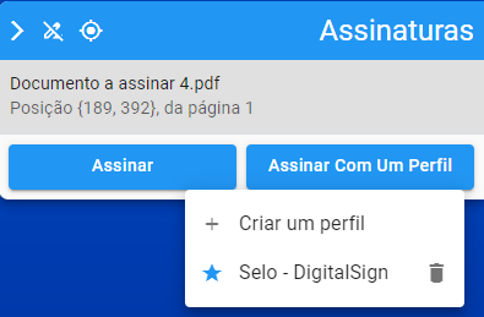
To change the favorite profile, simply click the star on the desired profile:
Once a profile is selected, a signature field will be added according to the configuration of the chosen profile.
The user can then drag the signature field to the desired position:
¶ Invisible Signature
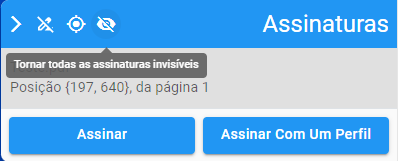
If the user prefers, it is possible to sign documents without inserting a signature field.
To do this, select the option Make all signatures invisible in the "Signatures" tab:
¶ Signing
When all settings match the user's preferences, click Sign.
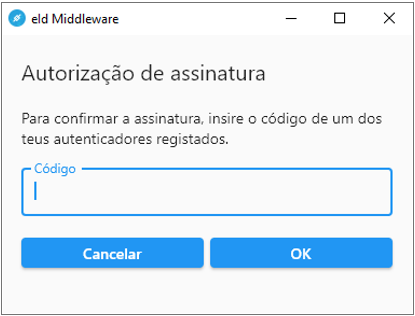
If the chosen profile is associated with an HSM Cloud certificate, the following window will appear, where you must enter the code provided by your authenticator or received via SMS:
Once the required code is entered, the following window will appear, allowing you to save the document:
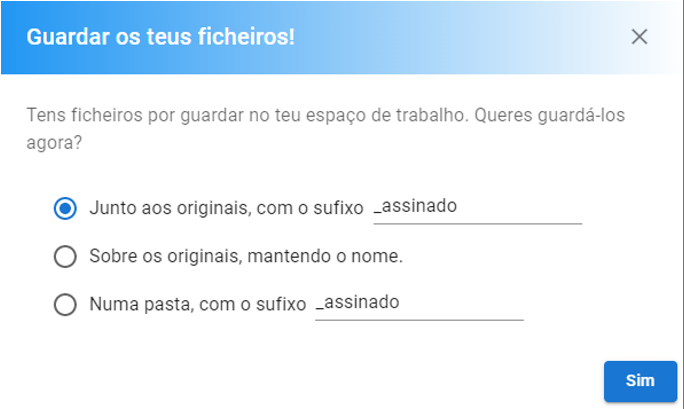
You will find three options for saving the document:
- Alongside the originals, with the "signed" suffix
The signed document will be saved in the same location as the original document, with the "signed" suffix. The suffix can be customized as desired. - Overwrite the originals, keeping the name
The signed document will replace the original document. - In a folder, with the "signed" suffix
The signed document will be saved in a location of your choice, with the "signed" suffix. The suffix can be customized as desired.